Dialog Designer
Overview
The Dialog Designer is where the entire chatbot can be built seamlessly.
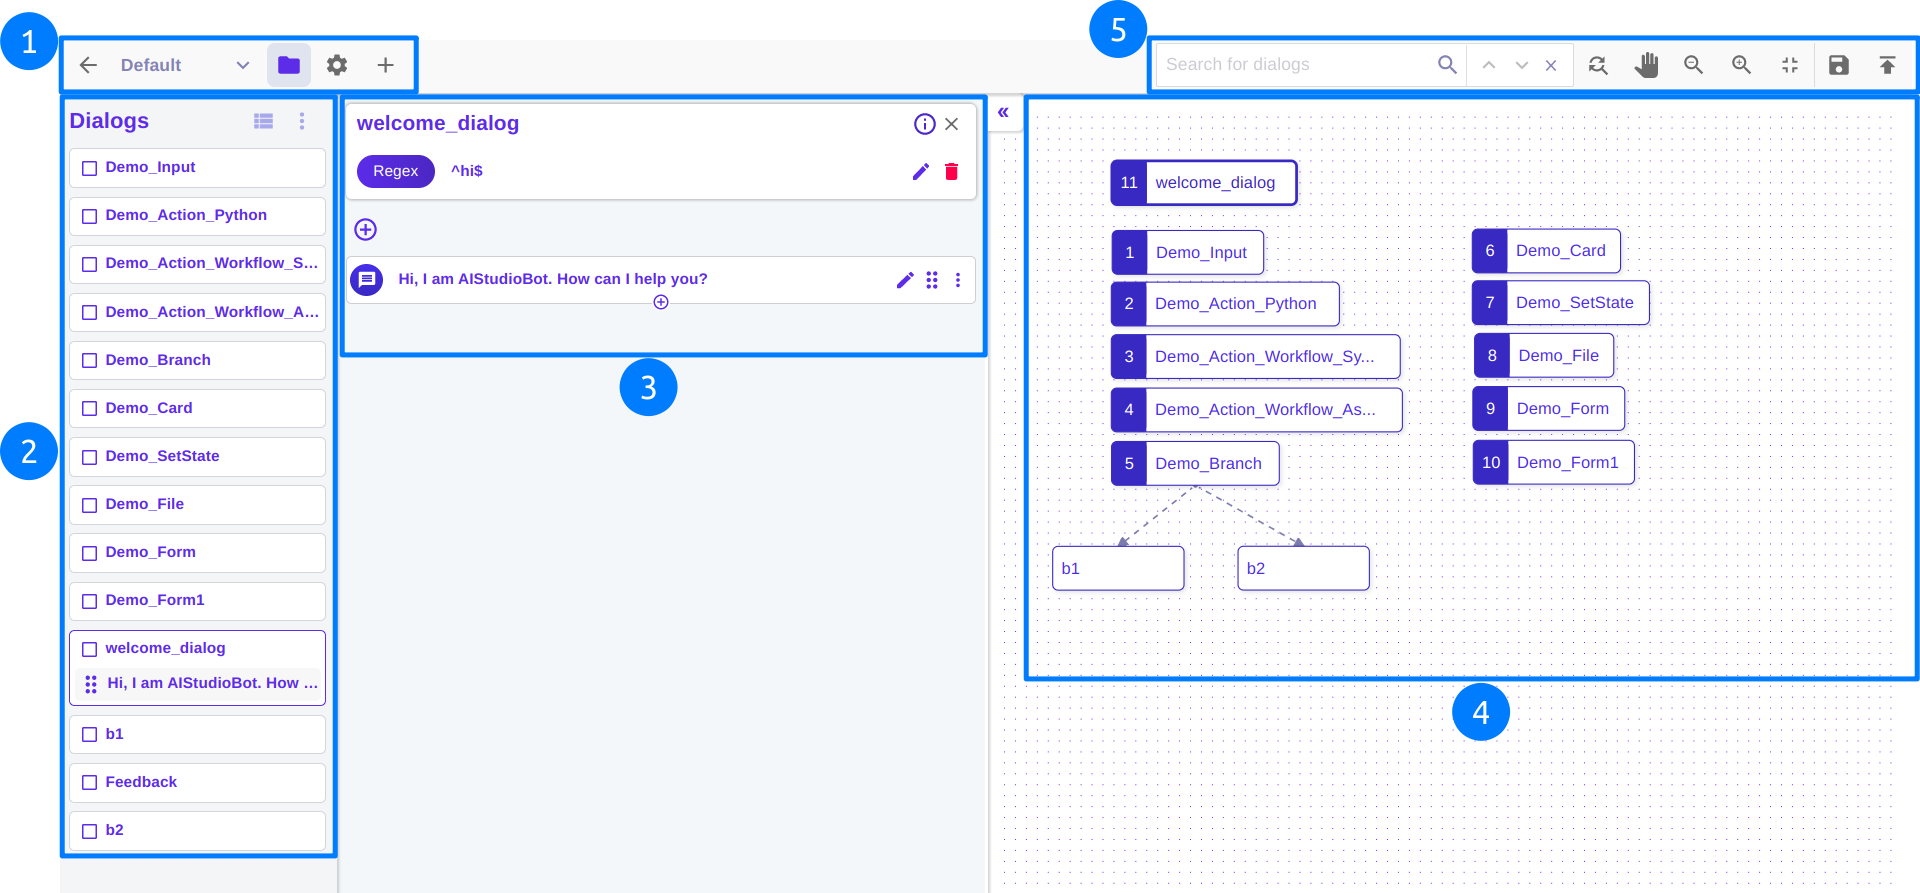
To view the dialog designer, click the Skill name. The Dialog Designer view is given below.
-
In case of multiple skills, Dialog Designer for any skill can be switched from the drop-down.
Dialog View ( ) shows or hides the Dialogs panel.
Skill Settings ( ) opens the Skills Settings dialog.info
For a detailed explanation of Skill Settings click here.
Add Dialog(
 ) creates a new dialog in the skill.
 -
Dialogs panel shows all the dialogs that have been created.
Specific dialog(s) can be selected by clicking the checkbox ( ).
).
Click the Rearrange Toggle ( ) icon to arrange dialog sequences. You can move each dialog using the Move icon (
  ). If the dialogs have triggers, on rearranging you can see the numbering change.
More options are available on ( ),
),- Import from Zip: A Dialogs zip exported from any other Dialog Designer can be imported to the specific skill using this option.
- Select All: Selects all available dialogs for further operations.
On the dialog(s) selection, the following options are also available,
- Export to zip: Export the selected dialog(s) to a zip.
- Copy: Copy selected dialog(s) to another skill/project.
- Clone: Create a duplicate of the selected dialog in the current skill. This option is available only if one dialog is selected.
- Delete: Delete the dialog(s) permanently.
- Clear All: Clear the selection of dialog(s).
You can also rearrange the Dialog Elements for the selected dialog in this panel using the icon (
). -
Dialog Editor: This panel is for configuring the dialog. Clicking a particular dialog on the canvas would open up this panel. You can edit triggers and add/edit Dialog Elements from here.
-
Canvas: This is the area of the designer where you can arrange and maintain the design flow of your chatbot.
Right-click canvas for more options,- New Dialog: Create a new dialog on the canvas.
- New Dialog from Workflow: Create dialog for calling workflows.
- Import from Zip: A Dialogs zip exported from any other Dialog Designer can be imported to the specific skill using this option.
- Select All: Selects all available dialogs for further operations.
- Paste: Paste the copied dialogs.
-
Options to manage the canvas are explained below,
- Search for dialogs: Enter the search words to search dialog(s) on the canvas. If any matches are found, the count is also shown in this section. You can move to the next/previous matches and clear the search as well. The current searched dialog is highlighted as

- Reset Zoom (
 ): Set the canvas to default zoom.
 - Drag mode(
 ): Freeze the dialog edit and move the entire canvas as needed.
 - Zoom in (
 ): Zoom in (magnify) the canvas.
 - Zoom out (
 ): Zoom out (minimize) the canvas.
 - Fit to screen (
 ): Fit all the dialogs/canvas on the screen.
 - Save layout (
 ): Once the layout is ready, you can save it using this icon.
 - Push Configuration (
 ): Any changes/updates on the canvas should be pushed to the chatbot using this icon. This syncs the entire project with the chatbot.
- Search for dialogs: Enter the search words to search dialog(s) on the canvas. If any matches are found, the count is also shown in this section. You can move to the next/previous matches and clear the search as well. The current searched dialog is highlighted as
Dialog
Dialogs are the building blocks of the chatbot. The dialogs are configured to be triggered based on the user utterance. Once the dialog trigger matches the user input, the dialog execution starts. Dialogs can be linked via conditional branches. Also, dialogs can exist without any trigger and can be executed only via branching.
Create Dialog
The dialog can be created using the add dialog (![]() ) icon or by right-clicking the canvas.
) icon or by right-clicking the canvas.
Enter the following details Create Dialog dialog:
- Name: Enter the name of the dialog.
- Description: Enter the description for the dialog.
- Trigger type: There are two types of triggers given below,
- Regex: Regular expression pattern matching. You have to enter the regex pattern in the Regex input field. If the user input matches the regular expression, this dialog would be executed.
- NLU: NLU intent matching. You need to select Intent from the dropdown. If the intent of the user input matches the selected intent, this dialog would be executed.
- Has Feedback: It enables taking user feedback after the dialog execution is complete.
The options related to dialog can be explored by right-clicking the dialog on the canvas:
- Select: Selects dialog(s) for further operations.
- Edit: Opens the Edit Dialog dialog, where you can modify the name, description, trigger, etc. of the dialog.
- Copy: Copy selected dialog(s) to an other skill/project.
- Clone: Create a duplicate of the selected dialog in the current skill. This option is available only if one dialog is selected.
- Export to zip: Export the selected dialog(s) to a zip.
- Delete: Delete the dialog(s) permanently.